static void Callback(AudioHandle::InterleavingInputBuffer in,
AudioHandle::InterleavingOutputBuffer out,
size_t size)
{
.
.
.
// AUDIO PROCESSING
double inputSample, inputLevel;
float inputLevelSum = 0.0;
for (size_t i = 0; i < size; i += 2) {
//Apply input gain
inputSample = in[i] * knobVal * 5;
// Read input level, output to rgb LED
inputLevel = inputLevelDetector.processAudioSample(inputSample);
if (i == 0)
inLevelLED.SetColor(getLEDColor(inputLevel));
// Process audio through fatPunch object
out[i] = fatPunch.processAudioSample(inputSample);
// Process audio through MelodyMode object
out[i] = melodyMode.processAudioSample(out[i]);
//Output sample to both channels
out[i+1] = out[i]; //interleaved output
}
.
.
.
}
Bass Pedal

Idea
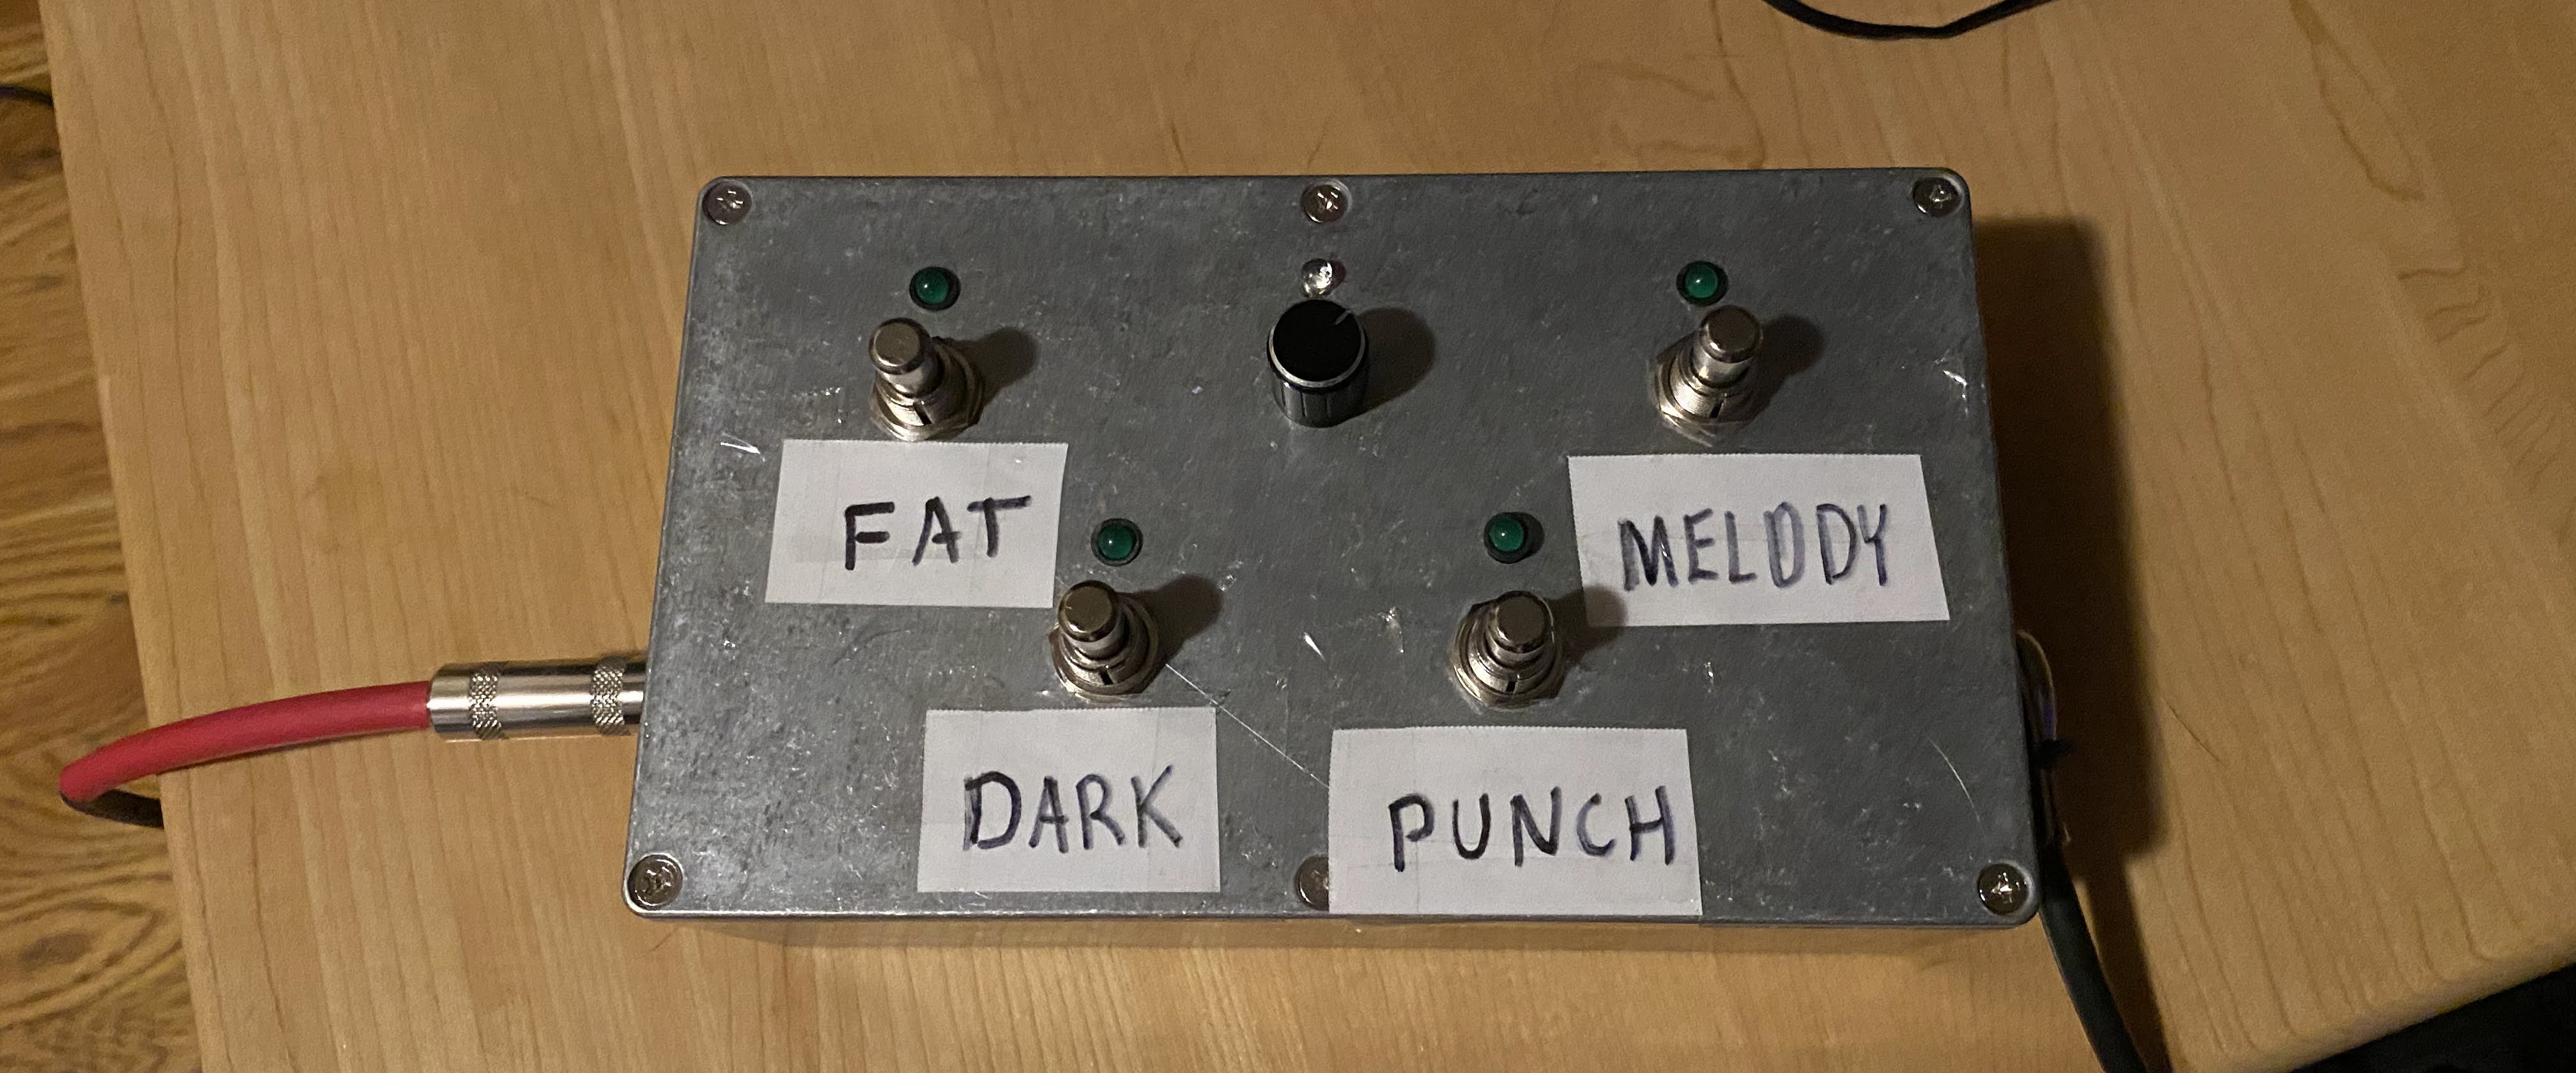
The idea for the Bass Pedal came from my dad, who plays bass guitar in a band. He pointed out to me the sound of the bass guitar in some songs he likes, and how it is sometimes "punchier" or "fatter" than the sound of his own bass when he plays live. I understood that the sound he was describing in the recordings he liked came from a combination of saturation, EQ, and compression, most likely applied by the producer or recording engineer. His band doesn't have a live sound engineer, so I decided to design him a pedal with some of these effects on it that would be easy to use in a live set.
Design
Because of the microcontroller I used for this project, the Daisy Seed from Electro-Smith, almost all of the design for this project was just programming. The built-in audio hardware on the board handles all of the conversion between digital and analog, so all I had to do were basically two things: 1) read input from the buttons and knob, changing effect parameters accordingly, and 2) write an audio processing function that takes an input audio buffer and creates a processed output buffer.
The hardware
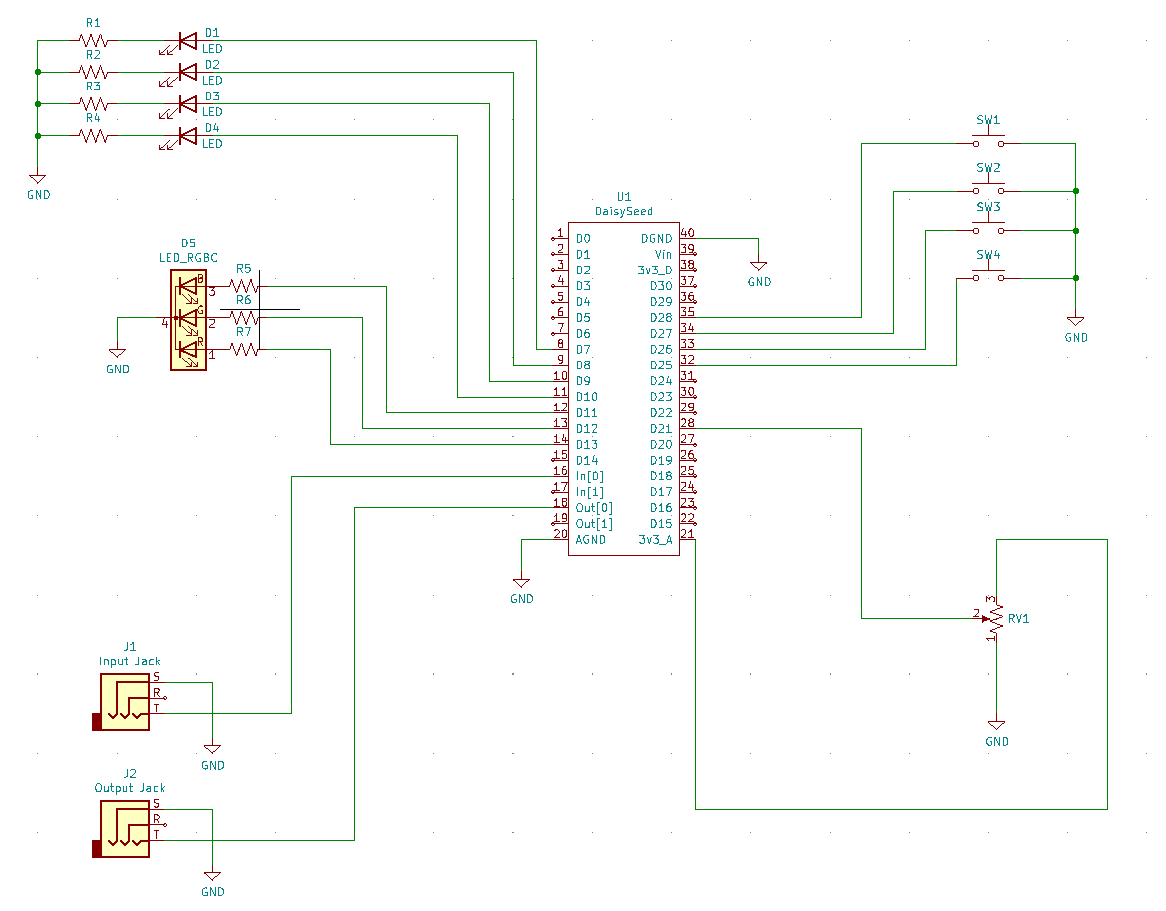
The hardware design for the bass pedal was very simple, since there was no analog audio processing happening. All I
had to do for the hardware was connect the audio jacks and all the user interface components (buttons, LEDs,
potentiometers) to the microcontroller. The schematic below shows how it is all connected:

The software
As far as the DSP code, I wrote two C++ effect objects for this pedal. The pedal does not allow the user to enable the "melody" effect and any of the other three effects simultaneously (it would probably not sound good since the effects are not designed for that), so the two effects are called "FatPunch" and "MelodyMode". The "FatPunch" object has three of its own DSP member objects (two filters and a compressor), with preset parameters, in addition to a waveshaper function for the distortion. Click on one of the functions below to show which objects are being used.
virtual double processAudioSample(double xn) {
// Step 1 - Distortion
if (parameters.fatOn)
xn = tanhWaveShaper(xn, parameters.inDistAmt);
// Step 2 - EQ
if (parameters.fatOn) {
xn *= dB2Raw(-6.0);
xn = lpeq.processAudioSample(xn);
}
if (parameters.darkenOn)
xn = hsf.processAudioSample(xn);
// Step 3 - Compression
if (parameters.punchCompOn)
xn = compressor.processAudioSample(xn);
return xn;
}
virtual double processAudioSample(double xn) {
if (!parameters.on) return xn;
// Distortion/Saturation
double yn = waveShaper(xn);
// EQ mid
yn = midEQ.processAudioSample(yn);
// Attenuate to make up for distortion boosts
yn *= 0.3;
// EQ high
yn = hiEQ.processAudioSample(yn);
// Output
return yn;
}
Approach
For this project, I used a Daisy Seed microcontroller from Electro-Smith to do all of the audio processing. It has a built-in ADC and DAC that are meant for audio, which meant the design of the pedal was pretty much exclusively code.
The controller interfaces fairly easily with buttons, LEDs, and potentiometers as knobs, so the hardware design was simple. The main challenge of this project was writing signal processing code that would sound good, and creating an interface so it is useful in a live setting.
 The first step was writing the DSP code to get the sound I was looking for. I wanted four pre-set effects, called
"fat", "punchy", "dark", and "melody". "Fat" was a combination of EQ and distortion, adding harmonics to the signal
and boosting low-mid frequencies. "Punchy" was a compressor with a relatively slow attack time, which meant it let
the initial transient of each bass note through before it starts to compress, creating a punchy sound. "Dark" was
just a high-frequency attentuation designed to allow space for the guitar to fill up the mix, and "melody" was
the opposite— a combination of harmonic distortion and EQ that adds higher frequencies and boosts them, allowing
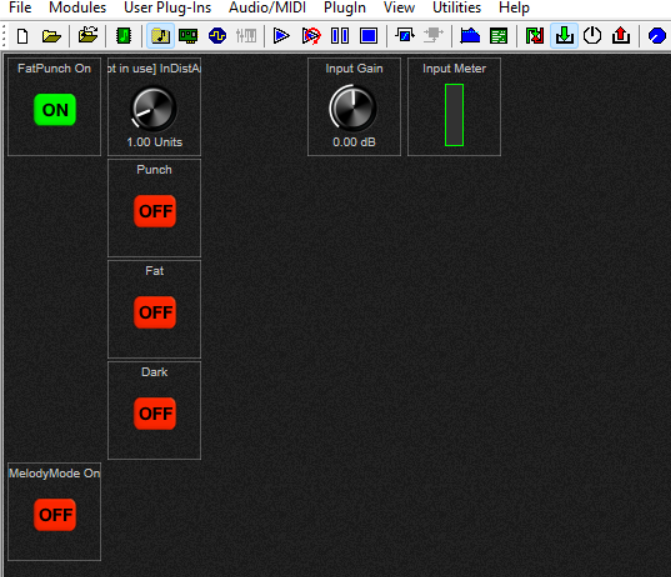
the bass to cut through the mix when it has a melodic line that should stand out. I prototyped my DSP code in RackAFX,
using a dry recording of my dad playing bass to test my algorithms.
Once everything sounded right, the next step was to try it on actual hardware. I plugged my microcontroller into a breadboard, and wired it up to some buttons, knobs, LEDs, and an audio input and output jack. With just a few small changes to my C++ audio effect objects, I was able to get them to work on the Daisy.
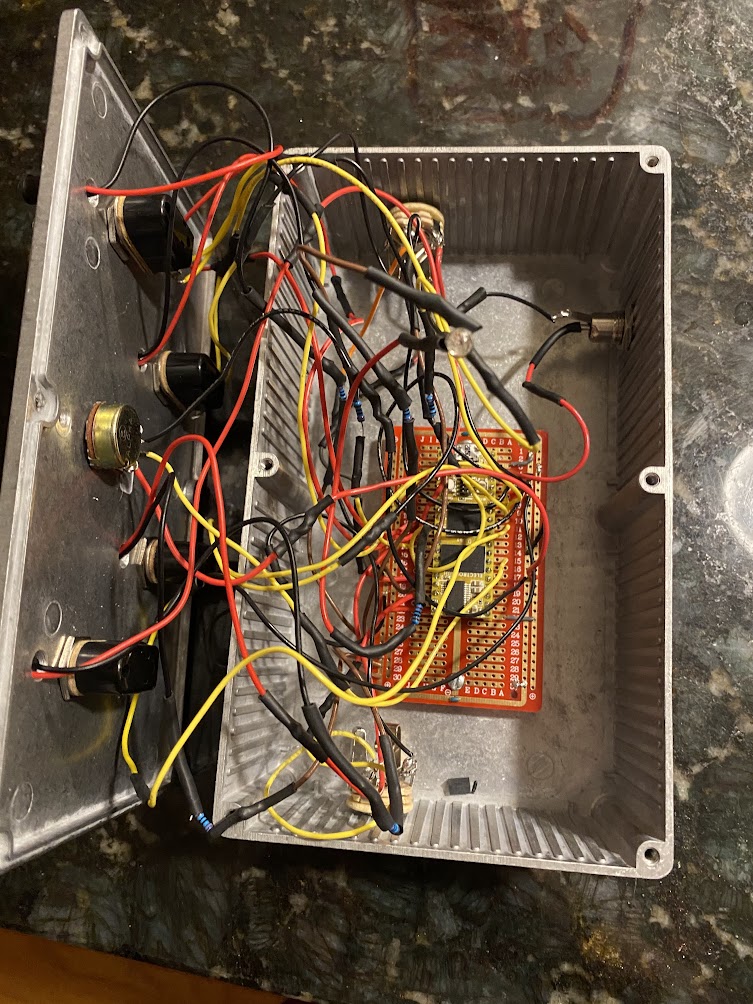
 Finally, once the whole bass pedal prototype worked on the breadboard, I ordered an aluminum enclosure, had some
holes drilled in it for the buttons, LEDs, knob, and input/output jacks, and built the actual pedal. I used solderable
prototyping board to make all the connections to the Daisy microcontroller, and soldered each button and LED in to the
board once they were secured in the enclosure.
Challenges
The biggest challenge in designing the pedal was making sure the audio is processed at the right level. Normally, a mix engineer would dial in a compressor's parameters or distortion drive amounts while listening to the processed signal, setting them to get the sound they want. This works fine when you can change parameters depending on the input signal, but I wanted to create preset effects with hard-coded parameter values. The issue was that if the input level was too low, the compressor would not engage and the "punch" effect wouldn't do anyhing, and the distortion would not affect the signal since the signal wouldn't reach the saturation region. If the level was too high, the signal might clip, or at least the distortion and compression effects could be too aggressive.
The solution to this was making sure the signal is set at a consistent level before it is processed. I first decided on an ideal input level range that will sound best when processed through the effect presets. Then, I built an RGB LED into the design to indicate to the user whether they are above, below, or inside that range. It lights up blue if the signal is too low, red if it is too high, and green if it is in the correct range. Before performing, the user can adjust their input gain level while playing until the LED indicates that the level is in the correct range. During the performance, they can use the footswitches to select the effect they want and it will sound right.